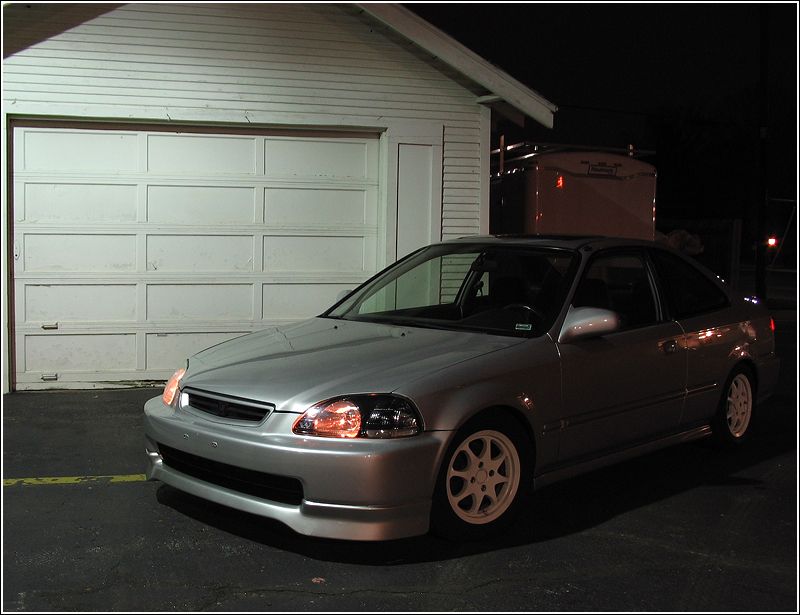
Ja, wo liegt das Problem... Einerseits, dass der eine jetzt kaputt ist, aber heute wieder zusammen geflickt wurde und das rechtliche natürlich!
Hatte gedacht, dass du, was das rechtliche betrifft, irgend eine Idee hättest, da du geschrieben hattest, dass es für DIY , KA was das bedeutet, eine einfache Lösung gibt! Na ja werde den Scheinwerfer mit der defekten LWR jetzt die Tage noch mal anbauen und dann mal schauen!
US SCHEINWERFER (Ej6-Ej8-Ej9)
Moderatoren: MrPellePelle, mugendan, Raccoon, Ace
- Alf
- REAL Member
- Beiträge: 4609
- Registriert: 28.02.2005, 13:24
- Wohnort: "...das Land ohne Prominente" & "Landkreis der Inzest-Bauern"
Iron ej6 hat geschrieben:Ja, wo liegt das Problem... Einerseits, dass der eine jetzt kaputt ist, aber heute wieder zusammen geflickt wurde und das rechtliche natürlich!
Hatte gedacht, dass du, was das rechtliche betrifft, irgend eine Idee hättest, da du geschrieben hattest, dass es für DIY , KA was das bedeutet, eine einfache Lösung gibt! Na ja werde den Scheinwerfer mit der defekten LWR jetzt die Tage noch mal anbauen und dann mal schauen!
Kannst da einfach so rumfahren. Hat BMW auch.
Abgesehen davon guckt der in den Schein und sieht (Honda USA).
Du kannst damit bedenkenlos fahren, solltest deine alten behalten und wenn dich doch einer anmacht, dann bauste um.
Es leuchtet ja leicht gelb nur nach vorne und der Rest nach hinten.
Für die DIY City Lights bei den USDM Scheinwerfern wirds halt ganz einfach gemacht.
1. Du schaltest die Corner Lights nicht an -> schaut dann so aus
2. Illegalste Variante wäre, wenn du die Blinker mit 2 Faden Birnchen zum leuchten bringst. Das fällt auf weils nicht erlaubt is, im Gegensatz zu dem USDM Scheinwerfern mit der kleinen Aussparung/Kammer.
3. Du hast sie dran. Lässt die Seitenteile gelb leuchten und die Standlichtbirnen normal weiß. Dann sollte es kein Problem geben.
And I've been a fool and I've been blind
I can never leave the past behind
I can see no way, I can see no way
I'm always dragging that horse around
o.k, aber die Dinger haben keine Aussparrung für das deutsche Standlicht... Da ist kein Loch wo unsere gute 5W Birne rein kommt... Da ist nur Platz für 1x H4 und 1xBlinker!!!! Und in dem Blinker gehäuse ist ein gelber Konus innen drinn...! DIY
@ALF
welche Kammer meinst du genau? Den Reflektor? Den gelben Konus? Ich habe doch nur 2 Kammern, einmal da wo die H4 drinne ist und die zweite, wo der Blinker ist!
@ALF
welche Kammer meinst du genau? Den Reflektor? Den gelben Konus? Ich habe doch nur 2 Kammern, einmal da wo die H4 drinne ist und die zweite, wo der Blinker ist!
- Alf
- REAL Member
- Beiträge: 4609
- Registriert: 28.02.2005, 13:24
- Wohnort: "...das Land ohne Prominente" & "Landkreis der Inzest-Bauern"
[QUOTE=Em0ne]After doing about 6 DIY black housing headlights, I finally decided to break down and do this. I wish i had a DIGI camera to help yah guys out but ok here goes.
On the 96+ US OEM EK headlights these is a place for city light sockets. If you will look closely you will notice a pattern/template (backside!) where the headlight would have been cut/stamped or some how formed to have an existing "city light". You will also note a "locking diagram" on the back of the light where the socket would be. So....lets begin!
1) Disconnect the battery.
2) remove the front bumper and grill.
3) Take your 96+ EK headlights off the car and look them over. Make sure you can see where the city light would have been.
4) Take a Sharpie or permenant marker and fill inside the "template" of the city light.
5) Find a Dremel tool with a small but semi abrasive bit (i used a small grinding cone to start mine).
** caution- do not attempt to drill this hole out with a drill, you will ruin your headlights!**
6) Once your ready for this DIY, and ready to make holes in your headlights begin removing the plastic from the shaded area with the Dremel tool. Remember you can also remove more material later but not add some so, slow down and take your time.
7) You will notice there are also 4 square cuts for the socket's "prongs" using the Dremel to start this but late finish them with an exacto knife and file.
Once the "socket hole" is made and all cleaned up and an OEM s2k sidemarker or such will fit and lock in your new HOLE. Move on to makeing a hole in the headlight
9) With the same high speed semi abrasive bit you used to start your socket holes,(still on the back side of the headlight) ook through the new hole and as straight as possible make a small hole in the "reflector/globe" of your headlight.
10) Approximate about an .5 inch oval on the actually "globe" That needs to be removed for the city light to protrude thru and reflect. ** find an upclose pic of a reall city light to get and idea of how much to remove**
11) Unseal the headlamp in the oven and finishcutting the oval hole for your "city light" **If you want that real JDM look while your lamps are apart, remove the makeshift reflector ( surrounds headlight bulbs). That is just some US regulations crap
12) Test fit your 194 bulb and JDM city light socket in it's new hole and make sure it sits far enough thru the headlamp to reflect light.
13) Re-seal the headlamp in the oven. (opposite of dissasembly)
14) Hard wire the city light to your corner lights or to your fuse box, to run with your corners or parking lights. Run a ground for the CL's. Turn your parking lights on and enjoy!
** O EK headlight you have to buy a JDM EK city light socket from ICBmotorsports or the such. Otherwise the 194 bulb won't even reach all the way into the headlight to reflect. TRUST ME! ** Get it here:
http://store.yahoo.com/yhst-14....html
ALL IMAGES ARE PROPERTY OF ICBMotorsports and used only to Illustrate product availble thru them:
*****EDIT: I made the hole and since my "JDM EK city light sockets hadn't arrived yet, I test fitted my S2K Sockets and they fit perfect! SO just get some S2K sockets!!!!!! ********
The OUTCOME
Modified by Em0ne at 6:21 PM 8/24/2004
Modified by Em0ne at 9:11 PM 9/14/2004[/QUOTE]
On the 96+ US OEM EK headlights these is a place for city light sockets. If you will look closely you will notice a pattern/template (backside!) where the headlight would have been cut/stamped or some how formed to have an existing "city light". You will also note a "locking diagram" on the back of the light where the socket would be. So....lets begin!
1) Disconnect the battery.
2) remove the front bumper and grill.
3) Take your 96+ EK headlights off the car and look them over. Make sure you can see where the city light would have been.
4) Take a Sharpie or permenant marker and fill inside the "template" of the city light.
5) Find a Dremel tool with a small but semi abrasive bit (i used a small grinding cone to start mine).
** caution- do not attempt to drill this hole out with a drill, you will ruin your headlights!**
6) Once your ready for this DIY, and ready to make holes in your headlights begin removing the plastic from the shaded area with the Dremel tool. Remember you can also remove more material later but not add some so, slow down and take your time.
7) You will notice there are also 4 square cuts for the socket's "prongs" using the Dremel to start this but late finish them with an exacto knife and file.
Once the "socket hole" is made and all cleaned up and an OEM s2k sidemarker or such will fit and lock in your new HOLE. Move on to makeing a hole in the headlight
9) With the same high speed semi abrasive bit you used to start your socket holes,(still on the back side of the headlight) ook through the new hole and as straight as possible make a small hole in the "reflector/globe" of your headlight.
10) Approximate about an .5 inch oval on the actually "globe" That needs to be removed for the city light to protrude thru and reflect. ** find an upclose pic of a reall city light to get and idea of how much to remove**
11) Unseal the headlamp in the oven and finishcutting the oval hole for your "city light" **If you want that real JDM look while your lamps are apart, remove the makeshift reflector ( surrounds headlight bulbs). That is just some US regulations crap
12) Test fit your 194 bulb and JDM city light socket in it's new hole and make sure it sits far enough thru the headlamp to reflect light.
13) Re-seal the headlamp in the oven. (opposite of dissasembly)
14) Hard wire the city light to your corner lights or to your fuse box, to run with your corners or parking lights. Run a ground for the CL's. Turn your parking lights on and enjoy!
** O EK headlight you have to buy a JDM EK city light socket from ICBmotorsports or the such. Otherwise the 194 bulb won't even reach all the way into the headlight to reflect. TRUST ME! ** Get it here:
http://store.yahoo.com/yhst-14....html
ALL IMAGES ARE PROPERTY OF ICBMotorsports and used only to Illustrate product availble thru them:
*****EDIT: I made the hole and since my "JDM EK city light sockets hadn't arrived yet, I test fitted my S2K Sockets and they fit perfect! SO just get some S2K sockets!!!!!! ********
The OUTCOME
Modified by Em0ne at 6:21 PM 8/24/2004
Modified by Em0ne at 9:11 PM 9/14/2004[/QUOTE]
And I've been a fool and I've been blind
I can never leave the past behind
I can see no way, I can see no way
I'm always dragging that horse around
- Alf
- REAL Member
- Beiträge: 4609
- Registriert: 28.02.2005, 13:24
- Wohnort: "...das Land ohne Prominente" & "Landkreis der Inzest-Bauern"
LWR geht nach Baujahr und da das nen "Import"-Fahrzeug ist, muss sowas nachrüstbar sein. Ein gescheiter TÜVer prüft sowas. Bei mir hat er nur geschaut, als er den Lichtkgel überprüft hat, ob mein Schalter ganz oben ist.
And I've been a fool and I've been blind
I can never leave the past behind
I can see no way, I can see no way
I'm always dragging that horse around
Wer ist online?
Mitglieder in diesem Forum: 0 Mitglieder und 55 Gäste